Hi! Todays post is all about stabilising the neckline of your Weiland Tank using clear elastic.
As you would have noticed, I have two sets of instructions for the Weiland Tank, with different methods of constructing your top. While this post is relevant for both sets of instructions, I am showing photos from from the construction method shown in the Alternative Instructions (where the side seams haven't been sewn together yet).
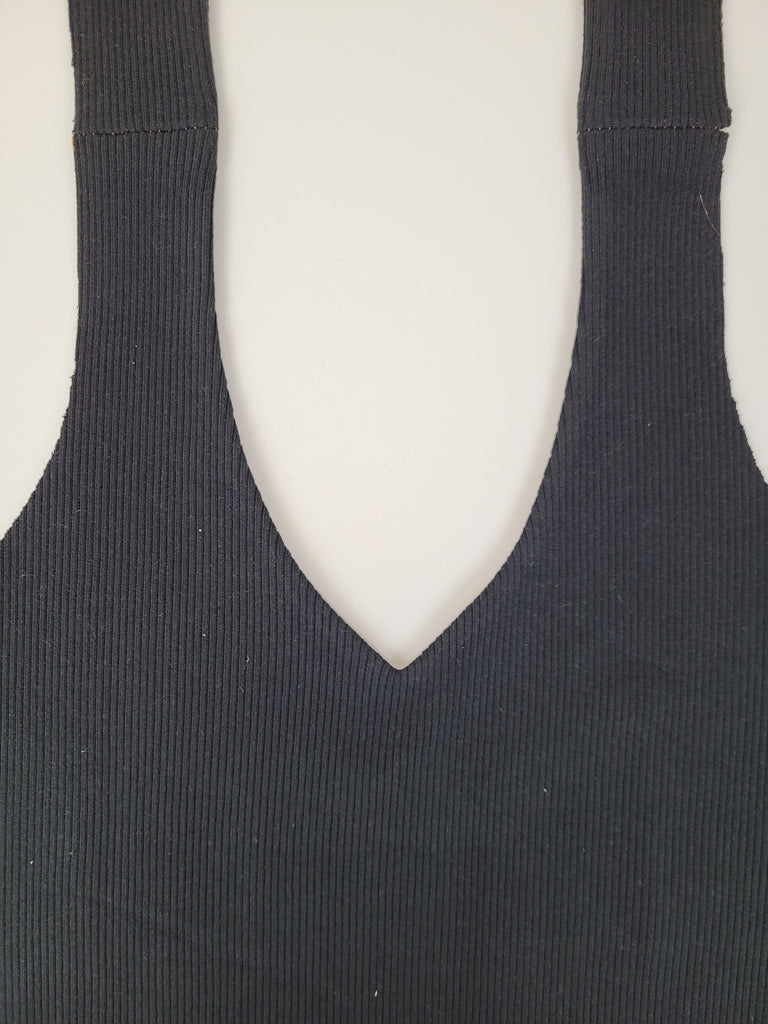
For this tutorial I am using a black rib knit as my main fabric and a pale pink ponte as my lining. And I am sewing View B, the V neck.
Before we start, I think it's helpful to talk about the machine foot you use for knitwear sewing. I've just used a general purpose foot here because I haven't had too much of an issue with it stretching out my fabric. But if you find that your foot grips the fabric to the point that it stretches and warps your fabric, then I would consider using a walking foot! This foot helps guide the layers of fabric through evenly.
I have sewn together the front and back pieces at the shoulder and pressed the seams open.

And done the same for the lining.

I've placed the lining and the main fabric right sides together, making sure the shoulder seams, centre front and centre back are aligned.

This step isn't necessary, but I like to mark in the centre of the V for View B. Use erasable fabric pen or chalk for this (I've actually used an artliner for this tutorial, only because my chalk wasn't visible for the photos and my top is black anyway so it shouldn't show later on. Don't do this on a lighter fabric).

Sew around the neck using a 1cm seam allowance. If you're sewing the V neck option, clip into the seam allowance of the points of the V.

Time to sew the elastic into the seam allowance. I place mine right next to the stitching of the neckline, on top of the lining. I like to give the elastic a few stretches to warm it up first before sewing it in.
For the V neck, I sew in two sections - from the centre front to centre back, and again on the other side. If you're sewing the scoop neck, you can sew it in one go, starting from the shoulder seam.
To begin, give yourself a tail of elastic to hold onto while you get the first few stitches in. Hold the elastic taut as you sew it onto the neckline. Try not to stretch the fabric as you sew.

Keep sewing till you reach the other side of the V. Chop off the excess elastic and repeat the process on the other side. Or if you're sewing the scoop neck, keep going around the neckline until you reach your starting point.

Trim off the excess seam allowance.

Understitch the seam allowance to the lining.

Fold the lining into the main fabric so the wrong sides are now facing together. Give the neckline a good press, ensuring that the lining isn't visible from the right side. Also keep in mind that you may need to lower the heat settings on your iron, now that you're pressing clear elastic.
Here's how mine looks from the right side.
And this is how it looks from the wrong side. Not my neatest work, I could've understitched closer to the point of the V, but ehh, nobody will be seeing this once I'm wearing it!

Hope this was helpful!
x Lauren
the 25th cannot come soon enough :)