When I was designing this pattern, I had a few different directions I could have gone in regards to the pocket situation. Ultimately I chose the minimal zip pocket that you can see below. A lot my customers mentioned layering this piece and something sleeker would be an easier fit under coats and jackets.
If you haven't already gotten your hands on a copy of the Davis Crossbody Vest pattern, you can find it here.
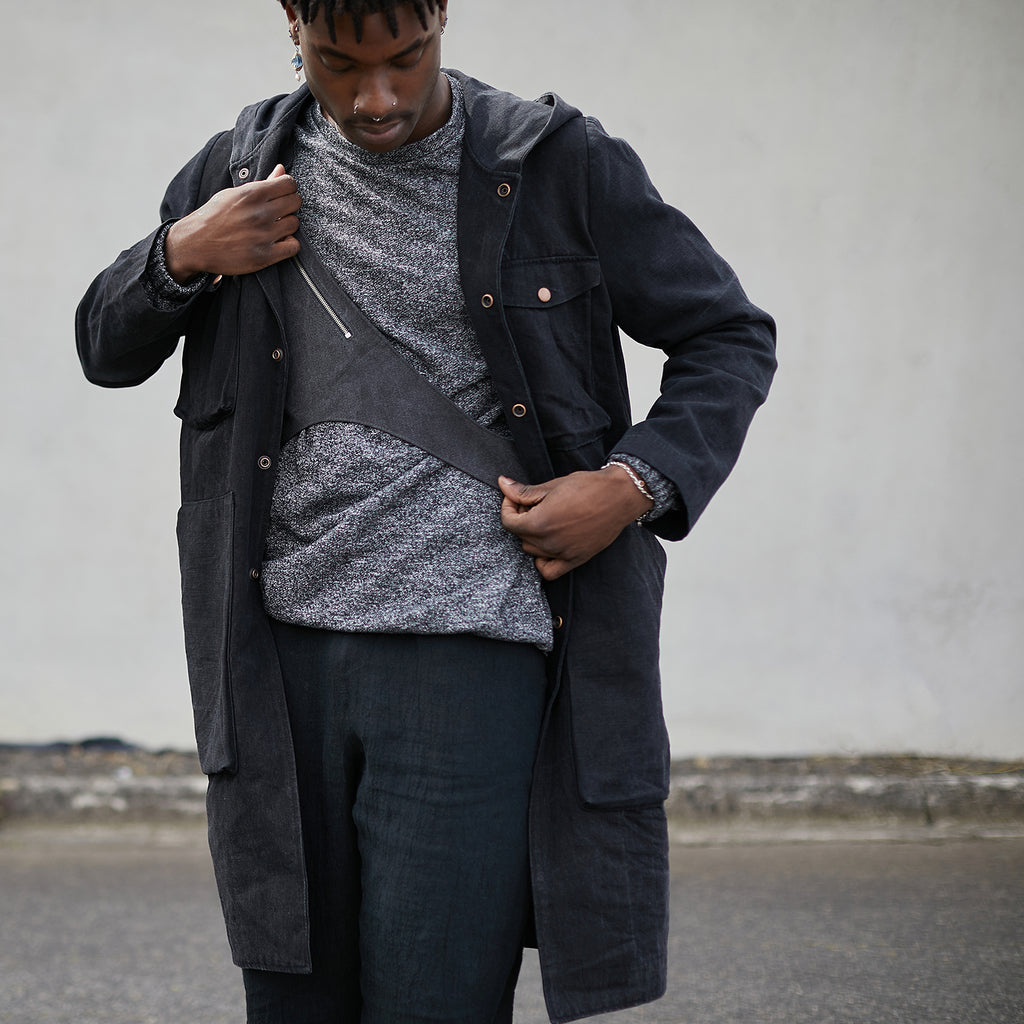
BUT today I'm coming at ya with 3D pockets galore. If you've got the Davis Belt pattern already (if you haven't, you can buy it here), you will notice I'll be taking the construction method from those pockets but altering the dimensions and adding a few extra bits and pieces to give it that utilitarian vibe.
OK. Let's get stuck in.
I'd highly recommend making a toile first so you can check the fit and play around with pocket size and placement before fully committing. I love calico or an old bedsheet for this as I can draw straight onto it to determine where the pockets will sit and any alterations I may need to make.
Now you can make it in your main fabric!
Follow the instructions given with the pattern to sew up the vest, skipping steps 2, 3 and 4 (the steps relating to the zipper pocket).
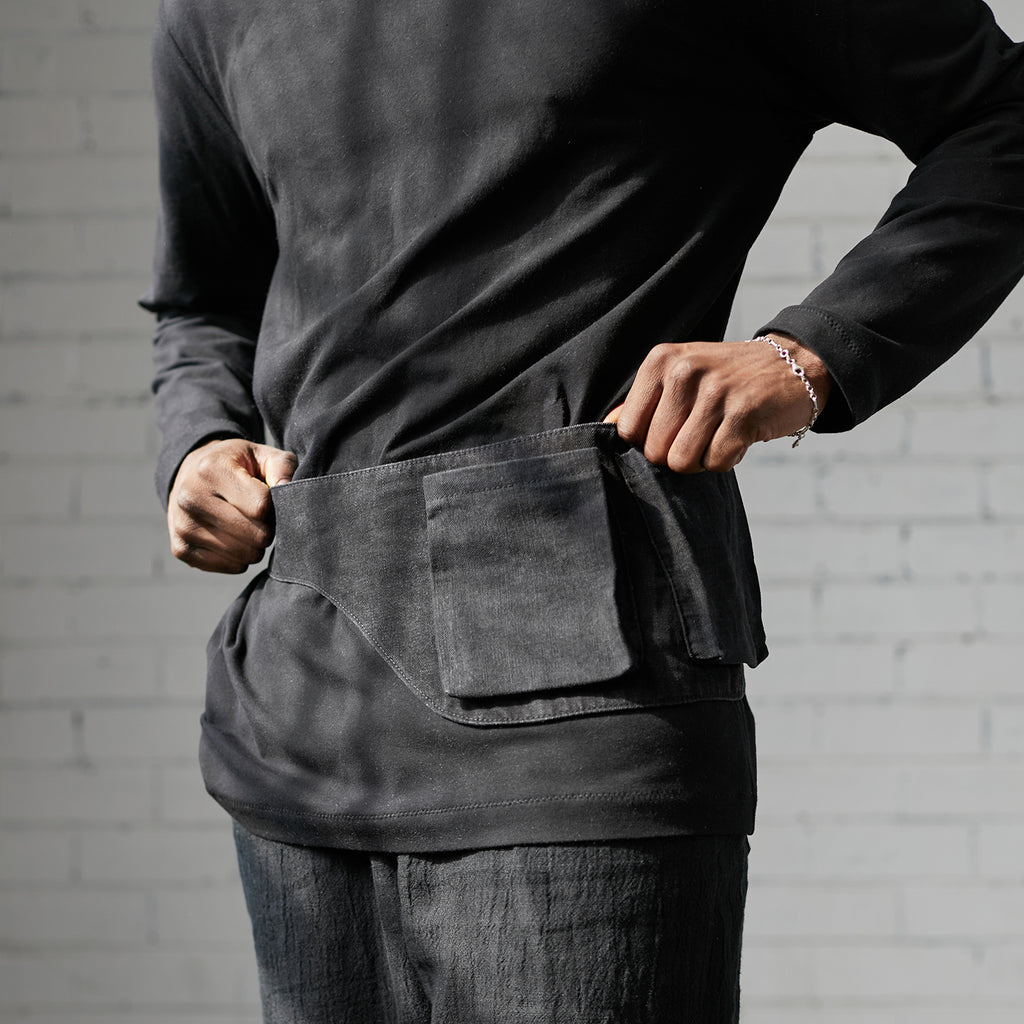
This will give you a fully lined, blank slate to attach your new pockets to. The way I do it, is to sew the pockets on over both the main and lining fabric (for extra security, in my humble opinion). If you'd prefer a neater finish to the insides of your garment, you're more than welcome to attach the pockets to the main fabric BEFORE attaching the lining!
If you're resisting making a toile (and yes... I know you probably are) there is another way to determine what size pockets you want.
Trace out your front pattern piece (and the back piece too, if you want pockets on the back) onto some spare paper.
Mark in the 1cm seam allowance. Cut out this shape.
This is the final shape that your vest will be.

You can draw onto these pieces of paper to check pocket size and configuration. Make note of the pocket dimensions for a later step. (This is the finished size of the pocket, the actual pattern piece will be larger once the depth and seam allowance are added in).
The size of your vest and your personal preference will make for size pockets, so don't feel like you have to copy mine. But for those playing along at home, I have made size D from Block 1 and my pocket dimensions are as follows:
Pocket 1 - 9cm x 12cm
Pocket 2 - 10cm x 16cm
Pocket 3 - 3cm x 10cm
Pocket 4 - 7cm x 9cm

I've also drawn up pocket flaps to go with pockets 1, 2 and 3. I have made them 1cm wider than the pockets themselves, to allow for full coverage of the pocket openings.
If you'd like to use my templates, you can download the PDF for free here. It's 5 pages and fits on both A4 and Letter size paper. I'd recommend opening the files in Adobe Acrobat and ensure you check the box in the print settings that says 100% or Actual Size.
I've printed mine out and I'm cutting them out in an offcut of my chosen fabric here.

I notice you have used the utility pockets without the sewn-in pocket on the original pattern. As someone who has had to contend with pick-pockets in the past, I would maintain the sewn-in packet with perhaps just one or two of the utility pockets. Am about to fit the calico for my first attempt
at this pattern!